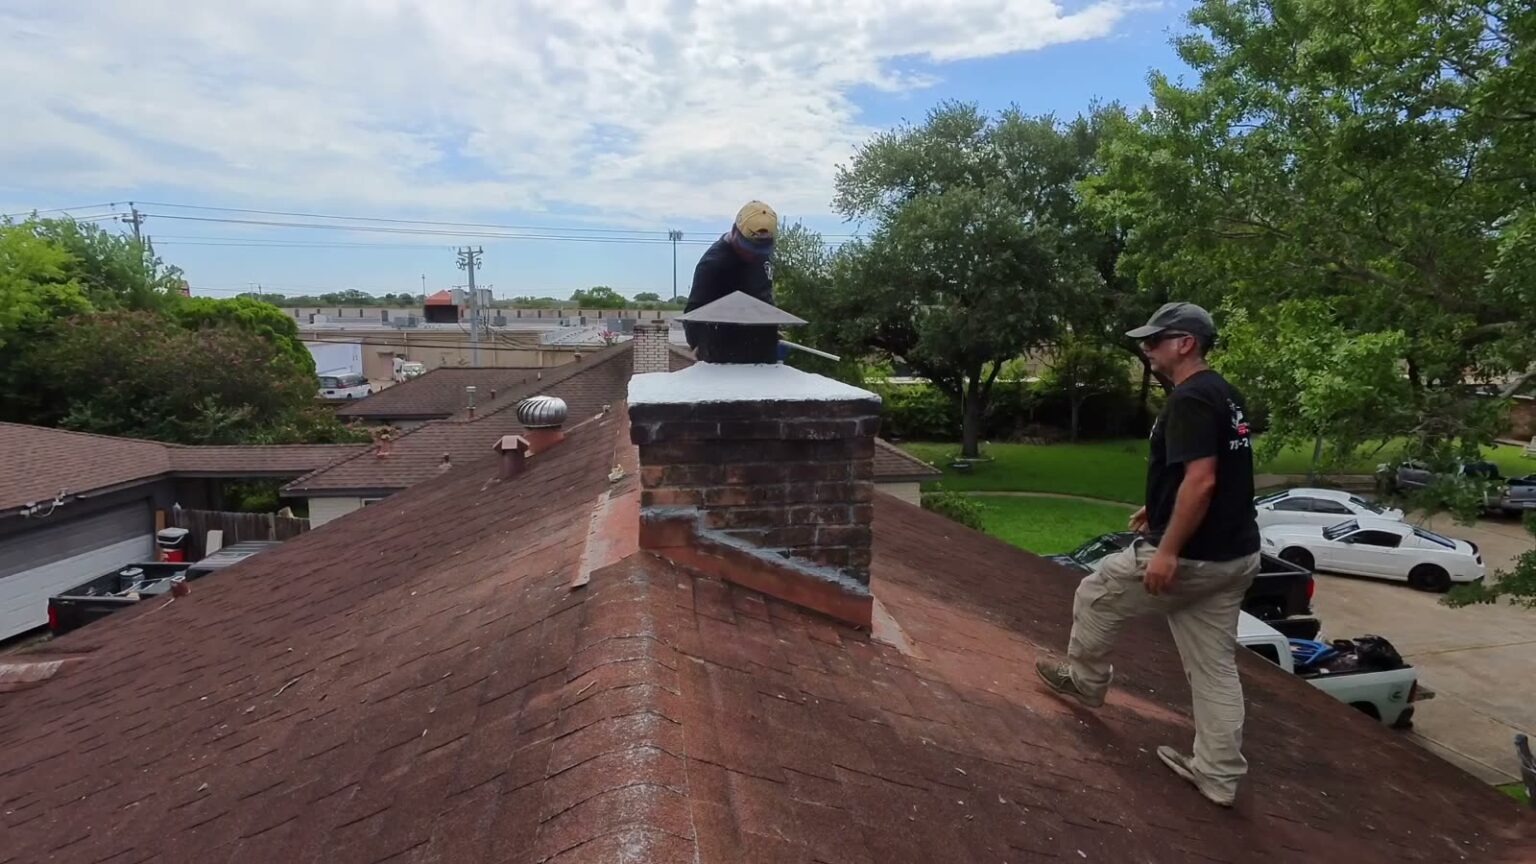
Chimney flashing is the metal system installed where your chimney meets your roof — its job is to seal that joint and direct water away from one of the most leak-prone spots on any house. When flashing is damaged, corroded, or installed incorrectly, water can work its way into your attic, ceilings, and walls, often long before you ever see a stain. This happens even on roofs that look brand new, because a roof replacement doesn’t automatically mean the chimney flashing was replaced along with it. Below, we’ll walk through what flashing actually does, why it fails, how to tell if yours has a problem, and what a proper repair looks like.
What Is Chimney Flashing, and Why Is It Necessary?
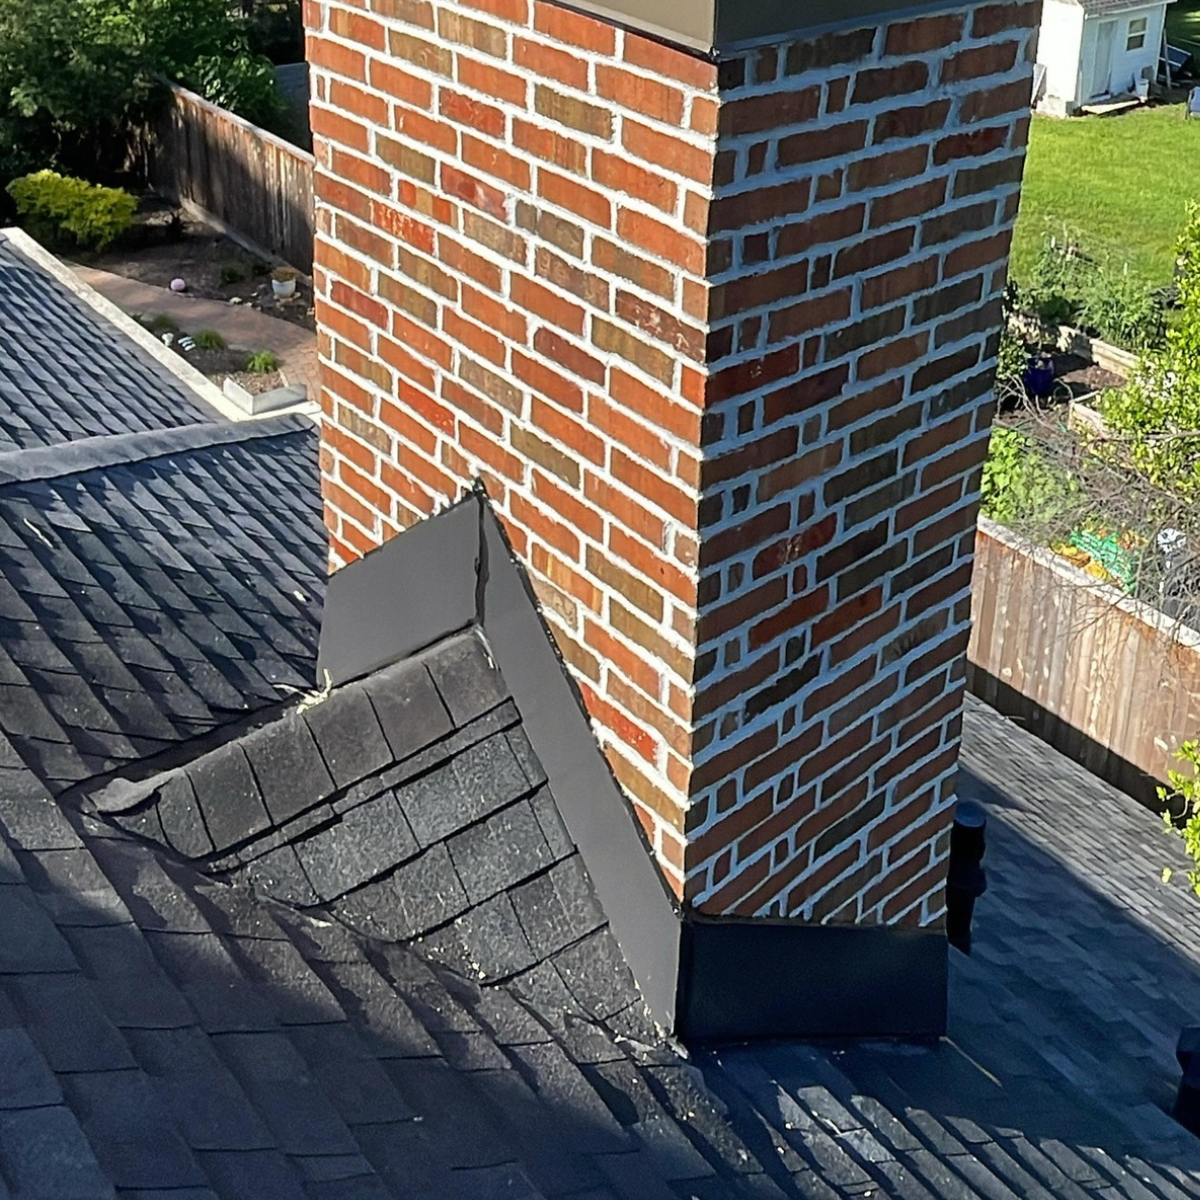
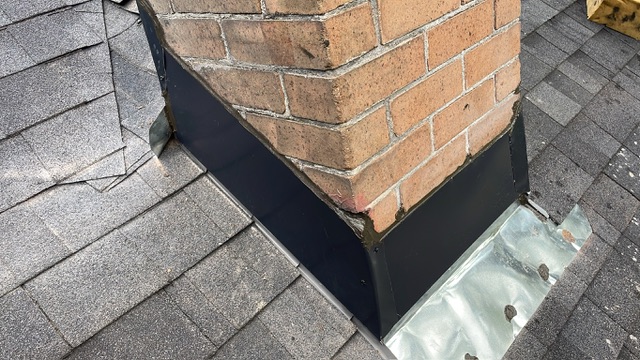
Flashing is a set of formed metal pieces installed at the seam between your chimney and your roofline. Shingles alone can’t seal that joint — the chimney interrupts the roof deck, so a dedicated water-management system has to route runoff around it instead of letting it pool or seep in. A complete flashing system is usually made up of several parts working together:
- Apron (or front) flashing — sits on the downhill side of the chimney, directing water that runs down the roof out and away from the base of the chimney.
- Step flashing — a series of individual L-shaped metal pieces installed along the sides of the chimney, woven in one piece at a time with each course of shingles as they go up the roof. This layered, overlapping installation is what lets water shed downward without finding a gap.
- Counterflashing — installed above the step flashing and embedded into the masonry mortar joints (or tied into the wall/siding detail on a framed chase), counterflashing overlaps the step flashing from above so water can’t get behind it. Think of step flashing and counterflashing as two halves of the same seal.
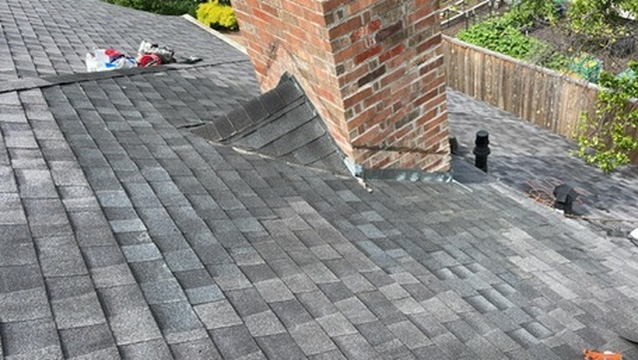
- Rear flashing / back pan — on the uphill side of the chimney, where the most water volume arrives, a back pan (sometimes paired with a saddle) redirects runoff around the sides rather than letting it dam up against the brick.
- Chimney cricket — on wider chimneys or lower-slope roofs, a cricket (a small peaked structure built behind the chimney) is added to actively divert water and debris around the uphill side instead of relying on flashing alone to hold back standing water.
It’s worth being clear about what flashing is not. It’s not the same as the chimney cap (the cover that keeps rain and animals out of the flue opening), the crown (the concrete cap on top of a masonry chimney), or a chase cover (the metal top on a framed, siding-clad chimney chase). Those components protect the top of the chimney; flashing protects the seam where the chimney meets the roof.
It’s also worth noting that masonry chimneys and framed, siding-clad chimney chases are different animals when it comes to flashing details. A masonry chimney relies on counterflashing set into mortar joints. A siding-clad chase relies on flashing integrated with the wall’s water-resistive barrier and siding details instead. An installation method appropriate for one isn’t automatically appropriate for the other.
Why Does Bad Flashing Cause Chimney Leaks?
Flashing fails for a number of reasons, and most of them are gradual rather than sudden:
- Corrosion, holes, and deteriorated metal from years of sun and moisture exposure.
- Loose, bent, or separated flashing — sometimes from foot traffic, storms, or age.
- Poor overlaps or incorrect integration with shingles, which leaves gaps water can find.
- Failed connections to masonry or the wall’s water-management system, often where old sealant has cracked or mortar has eroded.
- Exposed fasteners or poorly sealed penetrations that were never properly covered.
- Movement between the chimney and roof structure over time, which can open small gaps that weren’t there originally.
- Old patches or sealant that deteriorate — a prior repair that was never a permanent fix.
- Debris or poor drainage behind the chimney, which lets water sit against the flashing longer than it should.
- Flashing damaged during a reroofing job or an earlier repair, sometimes disturbed and not properly reset.
One of the more frustrating realities of chimney leaks is that water doesn’t always show up where it gets in. It can travel along the roof deck, a rafter, or the back of a wall cavity before it ever becomes visible as a stain — which means a water stain near your fireplace doesn’t necessarily point straight at the exact failure point. That’s why a proper inspection matters more than guessing from an interior stain alone.
Houston’s climate doesn’t do any favors here. Heavy rain, wind-driven rain that can push water sideways into gaps that would otherwise stay dry, and repeated cycles of heat and moisture all put ongoing stress on flashing and the seals around it.
What Signs Might Homeowners Notice?
You don’t need to get on your roof to spot warning signs — and we’d encourage you not to. Watch for:
- Ceiling or wall stains near the chimney, especially ones that appear or worsen after rain.
- Dampness, dripping, or a musty smell around the fireplace during or after storms.
- Peeling paint or damaged drywall near the chimney chase.
- Visible rust, gaps, loose metal, or thick globs of old patching material when you can see the chimney from the ground or a window.
- A leak that keeps coming back even after a previous sealing attempt.
Any of these symptoms can have more than one cause — flashing, the crown, mortar joints, or something else entirely — which is exactly why they call for an inspection rather than an assumption.
Why Don’t Roofing Companies Always Replace Chimney Flashing?
This is one of the most common points of confusion we run into, and it deserves a straight answer: a new roof does not automatically mean new chimney flashing.
There are several legitimate reasons this happens:
- The roofing contract may specifically exclude flashing replacement, or exclude certain components of it (like counterflashing).
- The existing flashing may have been judged to be in good enough condition to reuse.
- Replacing counterflashing on a masonry chimney can require cutting into and repointing mortar joints — work that falls outside a standard roofing scope.
- On siding-clad chases, proper flashing work can require pulling and replacing siding and wall details, which is additional labor.
- Custom-fabricated flashing (cut and bent to fit a specific chimney) adds cost and time that isn’t always included in a roofing bid.
- Some projects replace one component — say, the apron flashing — while leaving step flashing or counterflashing in place.
To be clear, this isn’t a knock on roofers. Many roofing companies install flashing correctly and thoroughly as part of their process. Reusing existing flashing isn’t automatically a defect, either — sound, compatible, correctly installed flashing can often be reused. The issue arises when flashing that’s damaged, corroded, or was never installed correctly gets left in place and covered over by a new roof, effectively locking a future leak in behind fresh shingles.
If you’re getting a new roof, here are the questions worth asking your roofer up front:
- Which chimney flashing components are included in this estimate?
- What will be replaced, and what will be reused?
- How will you evaluate the reused components before deciding?
- Is masonry or siding repair work included, if it turns out to be needed?
- Does this roof and chimney configuration need a cricket?
- Can I get photos of the completed flashing work before it’s covered?
- What warranty applies specifically to the flashing?
Getting clear answers before the work starts is a lot easier than diagnosing a leak after the fact.
How Texas Family Chimney Care Approaches Flashing Repairs and Replacement
Every chimney is a little different, so the exact scope of a flashing job depends on what we find once we’re up there. In general, our process looks like this:
- Inspect the chimney-to-roof connection and the surrounding area to investigate the source of a reported leak.
- Explain what we find and walk you through the recommended scope before any work begins.
- Remove affected shingles and failed flashing as needed to access the problem area.
- Check the exposed roof decking for water damage or deterioration.
- Address damaged decking if that’s part of the approved scope of work.
- Install appropriate underlayment or leak protection as part of the roof assembly at the chimney.
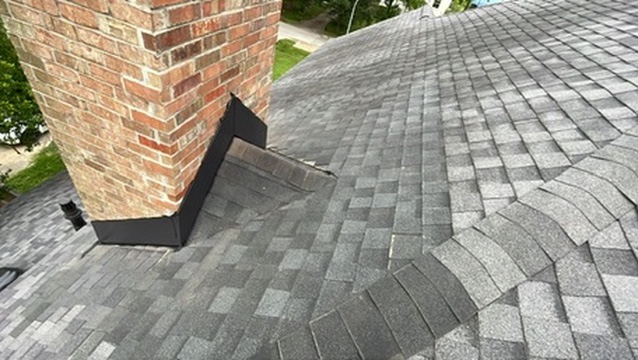
- Fabricate and install flashing suited to your specific chimney and roof configuration — masonry and siding-clad chases are handled differently.
- Integrate the new flashing with the surrounding shingles and the appropriate masonry or siding details.
- Address rear drainage or install a cricket, when the roof and chimney configuration calls for one and it’s included in the approved work.
- Replace disturbed shingles and do a final review of the completed work with you.
One thing worth setting expectations on: once shingles and old flashing come off, we sometimes find concealed damage — rotted decking, deteriorated mortar, more corrosion than was visible from the outside — that wasn’t part of the original scope. When that happens, we’ll explain what we found and what it would take to address it before doing any additional work. Not every flashing repair involves decking replacement, a cricket, or water testing — those are only part of the job when your specific chimney needs them.
Is Caulking Enough, or Should Flashing Be Replaced?
Sealants have a real, legitimate role in flashing systems — sealing specific joints, penetrations, or transitions where a small bead of the right material is exactly what’s called for. But caulk or roofing cement is not a substitute for metal. Coating over failed or corroded flashing doesn’t recreate missing material, correct improper shingle overlaps, or restore the layered drainage path that step flashing and counterflashing are designed to provide. It can buy a little time, but it’s treating a symptom, not the underlying failure.
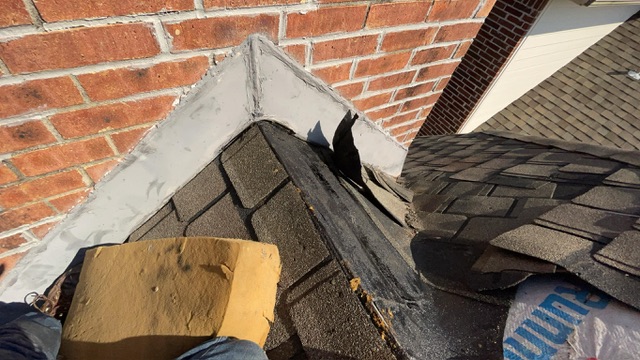
The honest distinction is this: a limited repair makes sense when the flashing itself is otherwise sound and a specific joint or seal has failed. Replacement is the right call when the metal is deteriorated, was installed incorrectly to begin with, or has failed in more than one spot.
| Situation | Limited Repair May Be Appropriate | Replacement May Be Recommended |
|---|---|---|
| Flashing metal condition | Solid, no corrosion or holes | Rusted, holed, or visibly deteriorated |
| Scope of the problem | One small gap or failed seal | Multiple failure points or widespread wear |
| Installation quality | Originally installed correctly | Poor overlaps, missing components, or incorrect method |
| History | First-time issue | Repeated leaks after prior sealing attempts |
| Age/condition of surrounding materials | Shingles and mortar in good shape | Surrounding materials also deteriorated |
Could the Leak Be Coming From Something Else?
Flashing is a common culprit, but it’s not the only one. Water intrusion around a chimney can also come from:
- A cracked chimney crown allowing water into the masonry from the top.
- Deteriorated masonry or failing mortar joints on the chimney itself.
- A damaged chase cover on a siding-clad chimney.
- A worn storm collar where a metal flue pipe passes through the chase top.
- A damaged or missing chimney cap.
- Siding defects near the chimney chase.
- Roofing problems in the surrounding field of the roof, unrelated to the chimney at all.
This is exactly why replacing flashing alone doesn’t guarantee a leak is solved if the actual source is the crown, the mortar, or something else entirely. A proper chimney inspection looks at the whole system rather than assuming the first visible issue is the only one.
FAQs
Can chimney flashing leak after a new roof is installed?
Yes. If the existing flashing was reused and it was already damaged, incompatible, or incorrectly installed, a new roof around it doesn’t fix that underlying problem.
Does a new roof include new chimney flashing?
Not automatically. It depends on what’s specified in the roofing contract — some jobs include full flashing replacement, others reuse existing components. It’s worth confirming directly with your roofer.
Can flashing be repaired instead of replaced?
Sometimes. If the flashing is otherwise sound and only a specific seal or joint has failed, a limited repair can be appropriate. Widespread corrosion or incorrect original installation usually calls for replacement instead.
Is chimney flashing the same as a chimney cap?
No. Flashing seals the joint where the chimney meets the roof. The chimney cap covers the top opening of the flue to keep out rain, debris, and animals. They’re separate components with separate jobs.
Does every chimney need a cricket?
No — it depends on the width of the chimney and the slope of the roof. Wider chimneys on lower-slope roofs are more likely to need one; your inspection will confirm whether yours does.
How much does chimney flashing replacement cost in Houston?
It varies based on the size and configuration of your chimney, whether it’s masonry or siding-clad, how much of the flashing system needs replacing, whether a cricket is needed, and what condition the surrounding roof and decking are in. We can give you a specific estimate after an inspection.
How do I know whether the leak is from the flashing or the chimney itself?
That’s exactly what an inspection is for. Because water can travel before it shows up as a stain, and because several different components can cause similar symptoms, the reliable way to know is to have the chimney-to-roof connection and the chimney itself inspected directly.
If you’re seeing water stains near your fireplace, a chimney that leaks when it rains, or you’re wondering whether your new roof actually included new flashing, we can take a look and tell you exactly what’s going on. We serve homeowners throughout Houston and surrounding areas including Spring, Conroe, Cypress, Pearland, Sugar Land, League City, and Galveston. Call Texas Family Chimney Care at 832-870-3118 to schedule a chimney leak inspection and get a clear, honest repair estimate.